Contact

Google Get AccessToken

1 . Auth Code 구하기

  • 플레이콘솔에 앱을 등록하고 아래 주소로 Auth Code를 구함
https://accounts.google.com/o/oauth2/v2/auth?scope=https%3A//www.googleapis.com/auth/drive.metadata.readonly&access_type=offline&include_granted_scopes=true&response_type=code&state=some&client_id=앱클라이언트ID&redirect_uri=redirect받을주소(GET으로 받을페이지) 
  • 위 사진에 보이는 ‘code’가 Auth Code이다.
  • Auth Code를 새로 추출하기 위해선 &prompt=consent 를 추가

2 . Refresh Token 생성

  • 위에 구한 Authcode와 ClientID, ClientSecret으로 Token을 구한다
$data = array('code'=>$_GET['code'],
         'client_id'=>"173073",
         'client_secret'=>"O68oj",
         'redirect_uri'=>"http://localhost:8011/receive.php",
         grant_type' => "authorization_code"         
);
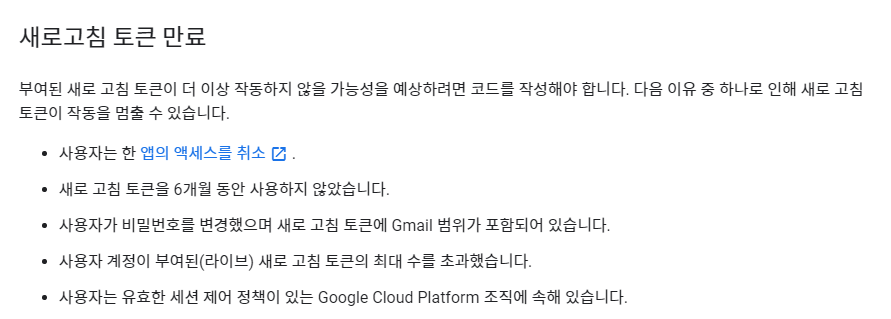
  • RefreshToken은 만료시간이 존재하지 않는다.
  • 아래와 같은 조건에서 토큰이 만료된다.
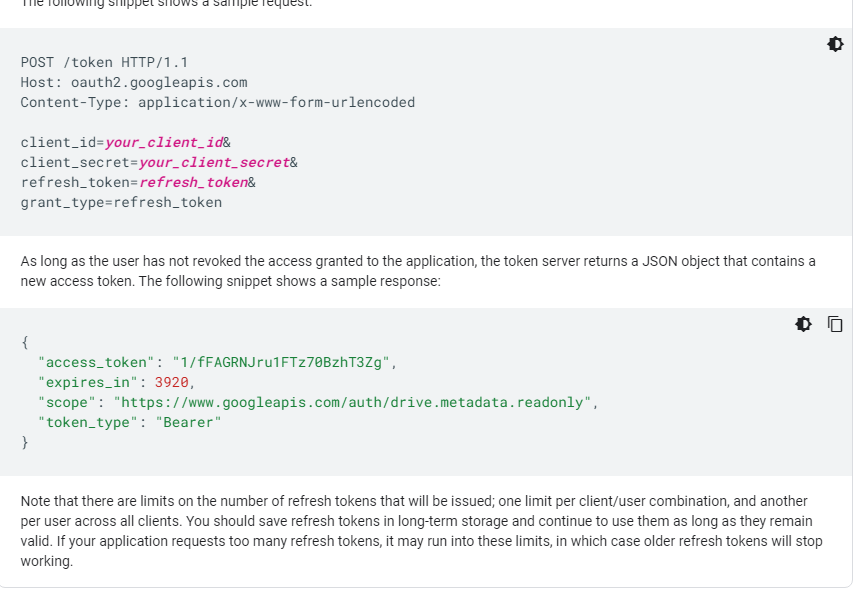
  • AccessToken은 만료시간이 존재하면 Refresh Token을 통하여 구해온다.

3 . AccessToken 갱신

구한 RefreshToken을 이용하여 AccessToken을 갱신

Ubuntu에 Jenkins 설치

# Jenkins 설치하기 (feat. ubuntu server 20.04)

1) VM 설치

  • Ubuntu server 20.04로 설치
  • Oracle VirtualBox사용

2) 네트워크 설정

# setting 
$ wget -q -O - https://pkg.jenkins.io/debian/jenkins.io.key | sudo apt-key add - 
$ sudo sh -c 'echo deb http://pkg.jenkins.io/debian-stable binary/ > /etc/apt/sources.list.d/jenkins.list' 
$ sudo apt update 

# install java
$ sudo apt install openjdk-11-jdk-headless 

# install jenkins
$ sudo apt install jenkins 
$ sudo systemctl enable --now jenkins 

# allow port
$ sudo ufw allow 8080  

# check first admin password
$ sudo cat /var/lib/jenkins/secrets/initialAdminPassword 

PHP – json_decode return null

  • PHP 에서 분명히 json형식에 string인데 json_decode가 null 일경우
$table = file_get_contents("table/test.json");
var_dump($table);

$table = preg_replace("#(/\*([^*]|[\r\n]|(\*+([^*/]|[\r\n])))*\*+/)|([\s\t]//.*)|(^//.*)#", '', $table);
$table = preg_replace('/[\x00-\x1F\x80-\xFF]/', '', $table);

$json_a = json_decode($table, TRUE);
  • 알수는없지만 json 파일 만들때 BOM형식이나 \n이 들어갈수있음

Ubuntu PHP 사용하기

Ubuntu에서 PHP 설치 및 mysql/redis 사용

  • PHP 설치
$ sudo apt update 
$ sudo apt install php-fpm php-mysql php-redis
  • php script 실행
<?php
phpinfo();
?>
  • php mysql
<?php
try{
$common = mysqli_connect("127.0.0.1", "test", "test11");
mysqli_select_db($common, "db") or die("db 선택실패");
$res = mysqli_query($common, "select * from t_test");
while($row = $res->fetch_array())
{
var_dump($row);
}
mysqli_close($common);
}
catch(Exception $e){
}
?>
  • php redis
<?php
 try{
        $redis_host = "127.0.0.1";
        $redis_port = "6379";
        $redis = new Redis();
        $redis->connect($redis_host, $redis_port);
        $redis->auth('PASSWORD');
        $res = $redis->hgetall('test:1');
        var_dump($res);
 }
 catch(Exception $e){
 }
 ?>
X-Forwarded-For

AWS에 ALB 같은 경우 클라이언트와 서버가 Direct로 연결된 형태가 아닌 Proxy 형태로 구성이 되어 있기 때문에 클라이언트에 IP를 직접적으로 알수가 없다.

L4나 Proxy Server 등에 경우 클라이언트에 요청을 가공해서 보내기 때문에 getRemoteAddr()등에 함수로는 알수가 없는 것이다.

이를 위해 X-Forwarded-For가 사용되었는데 해당 헤더에 값으로

X-Forwarded-For : clientIP, proxyIP1, proxyIP2

가 들어있다.

해당 헤더를 읽어서 클라이언트IP를 확인할수있다.